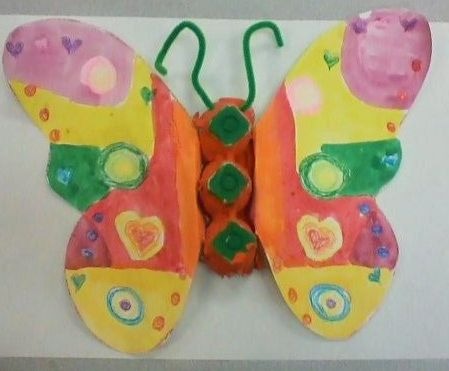
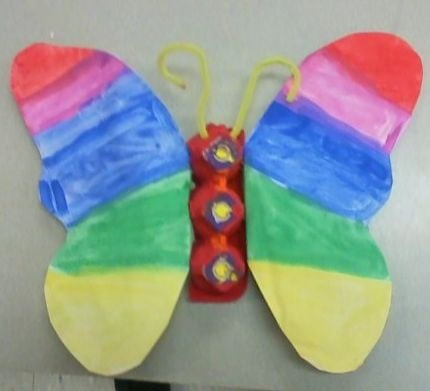
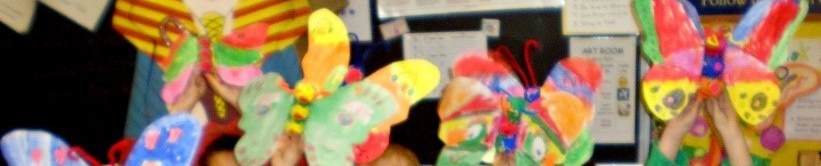
This is an excellent lesson for second through fifth graders! I used copy paper, pencils and markers but crayons work too. It's easy and fun! First, have students google information on Pablo Picasso and Cubism. Next, draw an oval for the head and neck and shoulders. Draw a line down the middle of the face with a nose pointing either left or right. Draw the eyes, ears, nose, eyebrows, ears, two different halves of a mouth all in different places. Experiment with different ways to create a crazy, mixed-up, cubist face which also included some crazy hair (using different types of lines). Add a mustache? Add arms and legs? Sure! Go for it! Just use lots of different colors and place the features in strange places. Key to the above results is coloring evenly and not using dried out markers. We outlined with black sharpie if you have one. Enjoy!
What a fun art project for kindy and first graders. You can use a lunch bag to make this puppet, or fold white construction paper in half and staple along the edges after coloring it. First make different types of lines with black crayon. They can draw lines that are wiggly, wavy, straight, dashed, zig zag or "castle". In between the lines they can either color in with different colors of markers or crayon OR paint with watercolors and blow dry. Finally add details like tails, hair, eyes, legs and arms. Bouncy legs are easy to make, just fold and turn, fold and turn to make bouncy legs and arms. Show them how to be careful putting their hand in and the folded opening of the bag becomes the mouth. SO CUTE! To get them inspired for a puppet show, you can read a good story about monsters or join in the fun yourself by making your own to use in the puppet show. Then let them put on a show for mom and dad!
This is an excellent one hour art lesson based on the picture book: Adventures of a Nose by Viviane Schwartz (order from your library). In this story, a nose goes on an adventure to try to find his place in the world. In each illustration, there are hidden eyes and a mouth, thus creating a "face" and students delight in finding the hidden features. Using paper, pencil and crayons, students can draw a simple nose going anywhere...swimming, walking, playing. The key is to HIDE two eyes in the scene and then let others guess where those eyes are? Remind them not to scribble, to change colors for variety, and to color evenly. Some children can even write their own nose story on the back or on an extra sheet of paper. You can also bring up this link where the illustrator, Viviene Swartz, demonstrates how she develops characters in this short and engaging video: https://www.youtube.com/watch?v=hCCaAZUyk3E
I found this excellent lesson on the internet for a quick one-day introduction to one point perspective. Click on this link for an excellent step-by-step lessons for upper el and middle school students to use to practice creating perspective drawings. There are many lessons out there but here is a good one: https://www.youtube.com/watch?v=sZD8BjTK8dE&t=19s
This is a quick one day make and take project for substitute teachers or parents with children at home. Usually I google "Native American shields" to look at designs and authentic shields. To begin, fold a paper plate in four equal sections. Then in each section draw shapes and designs or pictographs that are "the same" as much as possible, that mirror the the opposite corner. Then outline with black sharpie marker and color each design or shape with markers, keeping them simple and large. Finally paper punch around the plate holes that are two finger widths apart. Weave over under (or over around) with yarn, then finish the shield off with paper feathers. If shapes or pictographs are drawn large enough, these can be completed in one hour, give or take.
This is an interesting, colorful "cut and paste" collage lesson for third, fourth and fifth graders.(I would allow 3 to 4 weeks to complete, or one to two hours if a single collage is done by a student). Andy Warhol was a leader in the Pop Art movement who is most famous for his silkscreen portraits. Working with siblings or alone, the first step is to decide on a person or pet for this collage project. Possibilities include Mickey Mouse, Squidward, Sponge Bob, a pet, superheroes or famous singers. Next, draw the portrait in pencil on copy paper, making each feature a separate outline...i.e. draw hair, then glasses or hat, nose, mouth, neck or shirt. Each of these will become a tracer when cut out. Take four different colors of paper, and place a tracer over it. You can cut through all layers, but it is easier to trace it four times for four identical pieces, each in a different color. The final portrait should be laid out before it is glued together. This will result in four identical portraits out of colored paper, with each one having different colors. I taught this as a team project and it would be ideal for two or more siblings or students. This project is targeted for third through fifth grade students. When I taught this lesson we began by examining a variety of Aboriginal Dot Paintings from Australia, both contemporary and prehistoric, and noted a running theme across centuries: native animals. Animals were important to Aborigine survival and were a large part of their day to day lives. Step one is to pick one wild animal to depict in this dot painting. Next, carefully draw the animal in pencil. Using tempera paint, fill the inside of the animal with dots either with the eraser end of a pencil or with a q-tip (though q-tips tend to be messy). Finish off the designs with concentric circles, which is a common theme in many Aborigine artworks.
This lesson requires black construction paper, a pencil with an eraser and oil pastels. First, have your child find their desired light house by googling "Michigan lighthouse". Next, have your child use a ruler to draw the simple lighthouse outline, then draw the outline of grass and water. Next, using oil pastels, they can color them using smooth, even strokes filling in the grass, water and lighthouse. I recommend leaving the sky black for a beautiful lighthouse at night. I advise against adding scribbly-type stars as stars too often detract from the simple beauty of this art project. Children can also research how lighthouses are important in protecting ships on our Great Lakes.
|
Archives
March 2024
AuthorMy name is Mrs. Krupa and I'm an elementary art teacher at Oxbow Elementary. I'm a professional harpist turned art teacher of 20 years. I'll share art lessons and ideas on these pages, what works and doesn't. Enjoy! Categories
All
|